| This topic discusses: |
Links to related topics: |
| Search Online Doc | |
| Current Release Notes | |
Accounts Payable provides two methods of paying invoices electronically: EFT (electronic funds transfer) and EDI 820 Payment documents. This topic describes how to set up and use EDI 820 payment processing.
Hospitals that wish to use EDI 820 documents must contact the Help Desk for setup. Hospitals must obtain the needed transmission IDs from the bank that receives payments to vendor. Also, users will need to enter bank ID information and set several other parameters in their own bank and vendor records in the application.
To access organization, department, or asset location data, the organization, department, or asset location must be included in your data profile.
The following role objects control elements of this feature:
"Bank" - minimal setting is Create.
"VendorsAP" - minimal setting to edit a vendor AP location record is Modify.
"Payments" - minimal setting to edit a payment profile is Modify. To create or copy a payment run, the minimal setting is Create.
The Help Desk builds EDI 820 processing for the banks that vendors use. After you talk to the Help Desk, you may need to contact the bank for several pieces of information:
| Bank ISA Interchange Qualifier (ISA07) Bank ISA Interchange ID (ISA08) Bank Application Code (GS03) |
These are fields on the EDI document that identify the bank. |
| Payer ISA Interchange Qualifier (ISA05) Payer ISA Interchange ID (ISA08) Payer Application Code (GS03) |
These fields identify your hospital -- the "payer." |
EDI Transaction Document Formats has more detailed information about fields on an EDI document.
You will need to add EDI 820 information to several system Records:
From the Accounts Payable main Contents,
Note: Do not enter bank information for EDI 820 until the Help Desk has set up the bank. EDI 820 will not work.
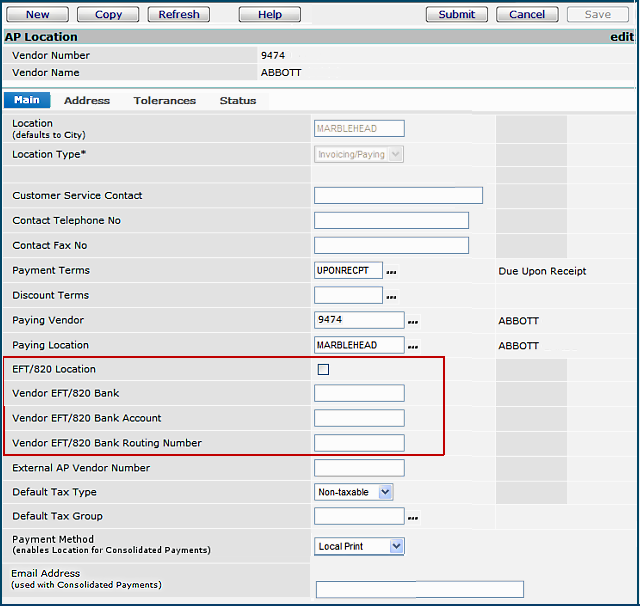
On the Main tab of the Vendor AP Location panel (Figure 1),
- Select: EFT/820 Location
- Enter a value in each field:
Vendor EFT/820 Bank
Vendor EFT/820 Bank Account
Vendor EFT/820 Bank Routing Number
- Click Submit when you are finished.
From the Accounts Payable main Contents, select Tables > Banks.
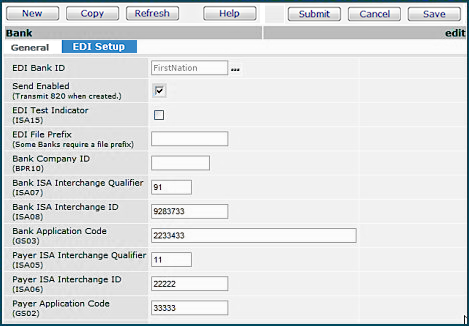
On the EDI Setup tab of the Bank edit panel (Figure 2),
- Select: Send Enabled.
- Using the information from the bank, enter a value in each field:EDI File Prefix
Bank Company ID (BRP10) (If required by the bank.)
Bank ISA Interchange Qualifier (ISA07)
Bank ISA Interchange ID (ISA08)
Bank Application Code (GS03)
Payer ISA Interchange Qualifier (ISA05)
Payer ISA Interchange ID (ISA08)
Payer Application Code (GS03)
- Click Submit when you are finished.
From the Accounts Payable main Contents, select Bank Accounts.
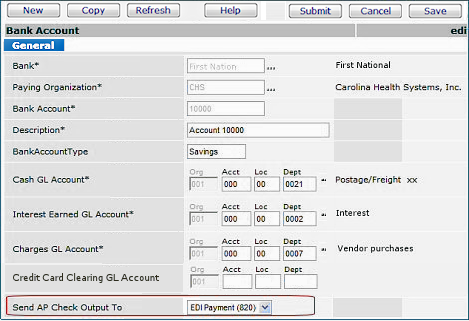
- On the Bank Account edit panel General tab, for the field Send AP Check Output To, select: EDI Payment 820.
- Click Submit when you are finished.
From the Accounts Payable main Contents, select AP Tables > Payment Profiles.
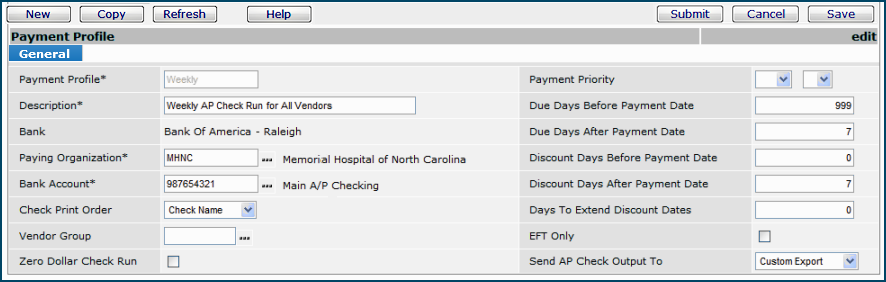
- On the Payment Profile Edit panel, for the field Send AP Check Output To, select: EDI Payment 820 (Figure 4A).
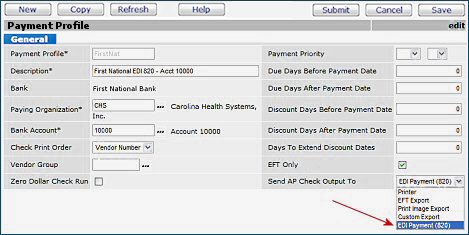
- Click Submit when you are finished.
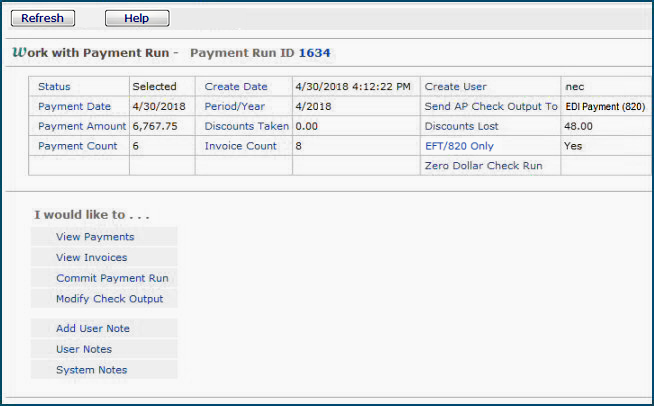
Once EDI 820 is set up, you can transmit payments to a vendor's bank account as EDI 820 documents.
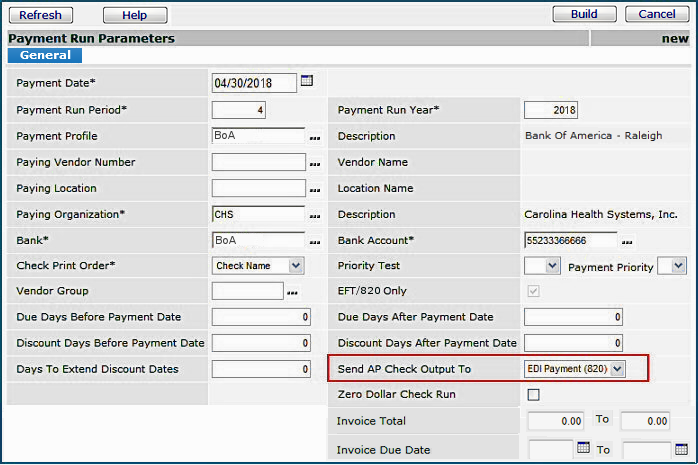
A payment run is built (Figure 6). The invoices selected for the payment run are only for EDI 820 vendors.
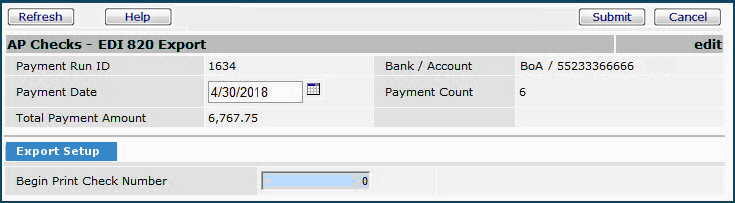
You can view the Payment Export (EDI 820) list and download an EDI 820 document, if you wish.
- From the AP Main Contents, select Imports / Exports > Payment Export 820 .
The list appears (Figure 8).

Copyright © 2023 by Premier Inc. All rights reserved.