Restricting Vendor AP Locations for an Organization Version
Contents
Overview
User access to vendor AP locations can be restricted to specific AP locations for each organization. For users who create invoices, for example, this feature eliminates the need to search for and then select the correct AP location. Users with the appropriate security setting can identify the AP locations available for each organization. The first AP location specified is the default, but the default can be changed.
Prompts for Vendor and AP Location fields appear when you create PO invoices, manual invoices, recurring invoices, EDI 810 invoices, payments, invoice groups, and more.
- When vendor AP locations are defined for the organization in Current Settings, clicking the vendor prompt and selecting a vendor automatically completes the AP Location field with the organization default. Users can select a different AP location, but only from among those defined for the organization.
- Otherwise, if no AP locations are defined for the organization, the AP Location field is populated with the Invoicing Location specified on the buy-from location record. All other AP locations for the vendor are available from the prompt.
Security
The “APLocRestrict" role object controls access to the activities needed to identify and maintain organizations' available vendor AP locations. This role object is initially set to None.
- Set “APLocRestrict" to Create or higher for users who assign and maintain organizations' restricted AP locations (Figure 1).
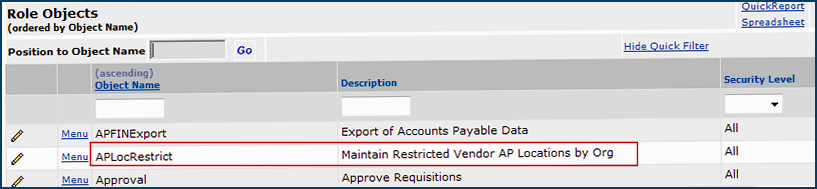
Figure 1 - The "APLocRestrict" Role Object for Maintaining Restricted AP Locations
Setup
To set up this feature, you identify one or more of a vendor's AP locations as available for an organization. Users can then only choose an AP location from those identified for the organization.
To identify AP locations for a specific organization:
From the main Materials or AP Contents, select Vendors > Vendors.
The Quick Click menu appears.
- On the Quick Click menu, under "I would
like to..." select View the Vendors List.
- Enter the Vendor Name in the box under For... and click Go.
- Click the edit icon
 to edit the vendor record.
- Click the Restricted AP Locations tab.
The Vendor Restricted Orgs for AP Locations panel appears (Figure 2). A list of organizations appears. (The displayed organizations are those that your data profile allows.)
Note: This tab is only visible when the “APLocRestrict” role object has View authority, as a minimum. The tab and panel are also available on the Vendor Inquiry panel.
- Click the Select AP Locations link to assign an AP location to the organization (Figure 2).

Figure 2 - Selecting Vendor AP Locations for an Organization
A list of AP locations for the vendor appears (Figure 3).
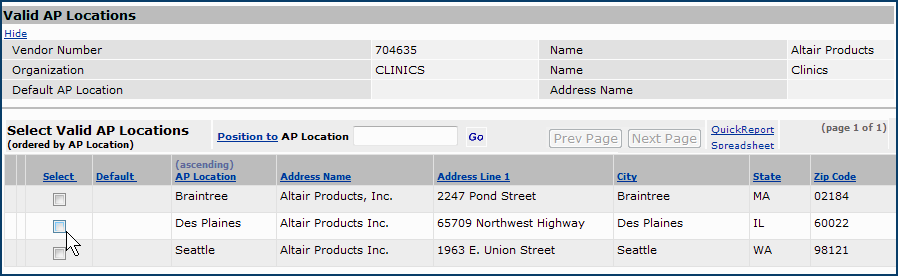
Figure 3 - Vendor AP Locations Available for Assignment to an Organization
- Click the Select box to assign an AP location to the organization.
- Click Save and Submit.
Selecting an initial AP location (and then pressing Enter or clicking Save) automatically restricts the organization to that AP location and sets the AP location as the default for the organization. Multiple AP locations can be selected at the same time before pressing Enter or clicking Save. The initial AP location selected is designated as the default, and the remainder of the AP locations are available for the organization.
- Click Refresh. Then, if you wish to change the organization's AP location default, click Set Default (Figure 4).
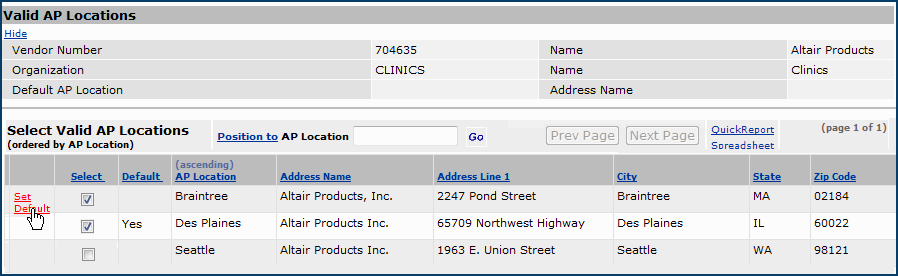
Figure 4 - How to Change the Default AP Location for an Organization
In Figure 4, Braintree and Des Plaines are available AP locations for vendor 704635 in the organization Clinics. Des Plaines is the default location. Seattle is not available to users for vendor 704635 in organization Clinics.
Once the AP locations are specified, the Vendor Restricted Orgs for AP Locations panel (Figure 2) displays Yes in the Restricted column for the organization. The default is in the Default AP Location column.
"Unrestricting" an Organization
AP locations for an organization can be “unrestricted” by selecting Menu > Remove Restrictions (Figure 5). This menu option removes all of the AP location assignments.
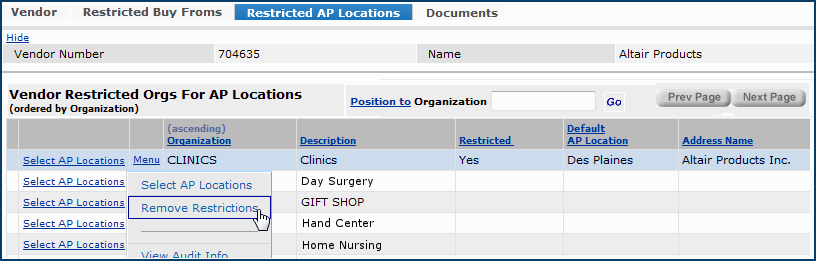
Figure 5 - "Unrestricting an Organization's Vendor AP Locations
When no restrictions are defined for a vendor and organization, all AP locations are available for selection. The default AP location identified on the vendor record is used for purchase orders.
Invoices for POs, Manual Invoices, Recurring Invoices, and EDI 801 Invoices
When you create an invoice, the system checks if vendor AP locations have been assigned to the organization in your Current Settings. If so...
- When you click the prompt on the Invoicing Vendor Number field and select a vendor, the vendor AP location defined as the organization's default appears in the Invoicing Location field (Figure 6).
- Clicking the Invoicing Location prompt displays only the assigned AP locations for the organization. You can select another AP location, if another is specified for the organization (Figure 6).
The rules are the same for manually created invoices, EDI 810 invoices, and recurring invoices.
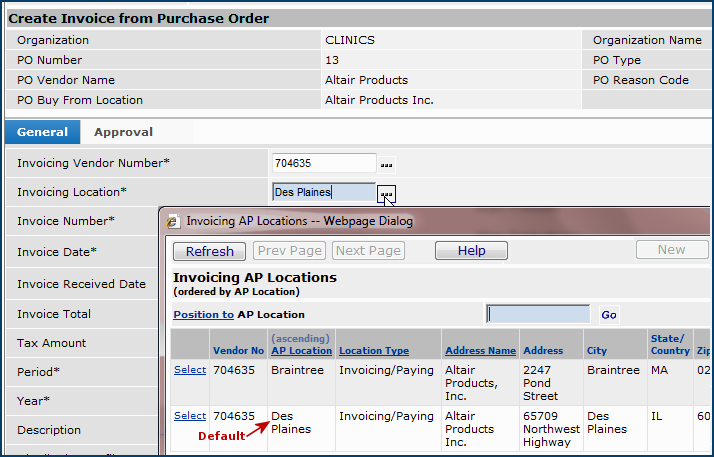
Figure 6 - Available AP Locations for a PO Invoice
Invoice Groups
When one or more vendor AP locations are assigned to the organization in Current Settings,
- The Default Invoicing Location for invoice groups displays the organizational default AP location (Figure 7).
- You can select another AP location by clicking the prompt. Only AP locations that have been assigned to your organization are available.

Figure 7 - Creating a New Invoice Group
Check Requests and Payment Runs
Figure 8 is an example of creating a check request. Figure 9 is a Payment Run being created.
If the organization displayed in Current Settings has vendor AP locations assigned, the organization default appears in the Invoicing Location field. You can select a different AP location, but only from those defined for the organization.
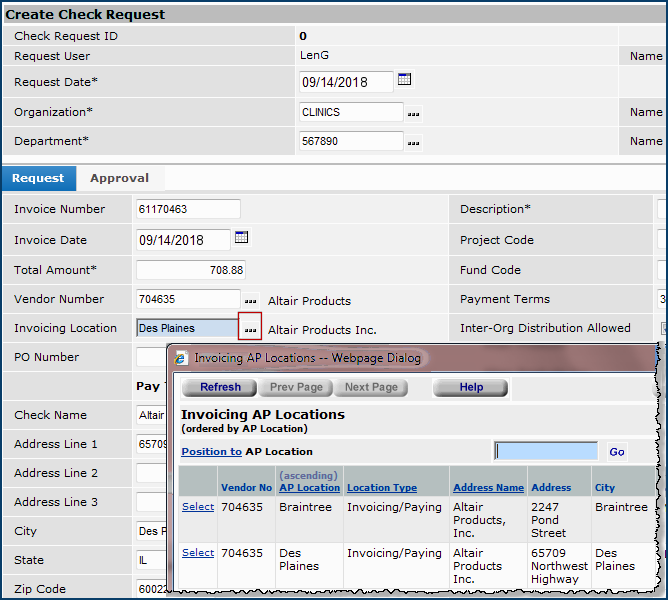
Figure 8 - Creating a Check Request
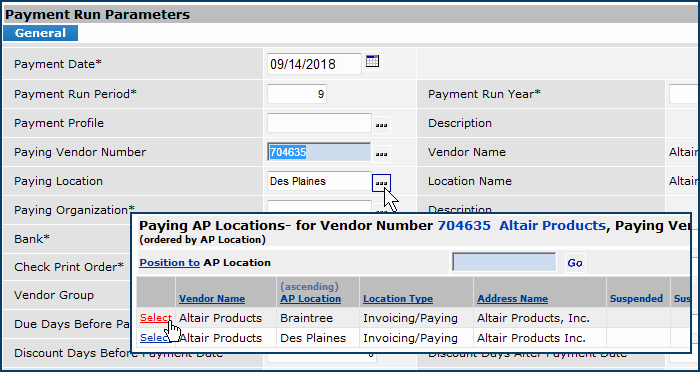
Figure 9 - Creating a Payment Run
Buy-From Location Setup
When you create a new buy-from location for a vendor, you must enter the fields Invoicing Vendor and Invoicing Location if the vendor is an MM/AP vendor. Figure 10 is an example. If the vendor's AP locations are restricted for your organization, the organizational default appears in the Invoicing Location field. You can select a different AP location from among those defined for your organization.
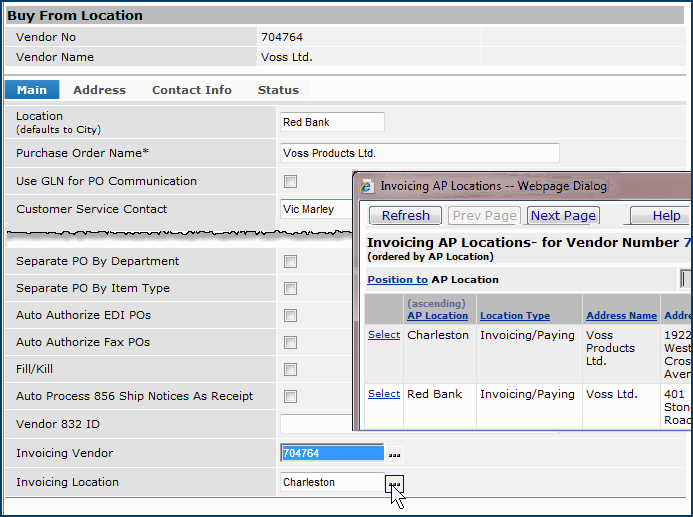
Figure 10 - Creating a New Vendor Buy-From Location
Importing AP and Buy-From Location Restrictions
This import covers AP, MM, and MM/AP vendor types.
Security
Users working with this feature must have the role object "VendorImpRestrictLoc" set minimally to Modify.
To use the import:
- Contact the Help Desk for a copy of the template that you will use to specify organizational restrictions. The fields are in Figure 11. The template provides for both buy-from location and AP location restrictions.
Important: The import file must be a .csv file. If you use a spreadsheet to edit the fields, be sure to save it as .csv. Also, the final entry in the import file must be <EOF>, on a line by itself.
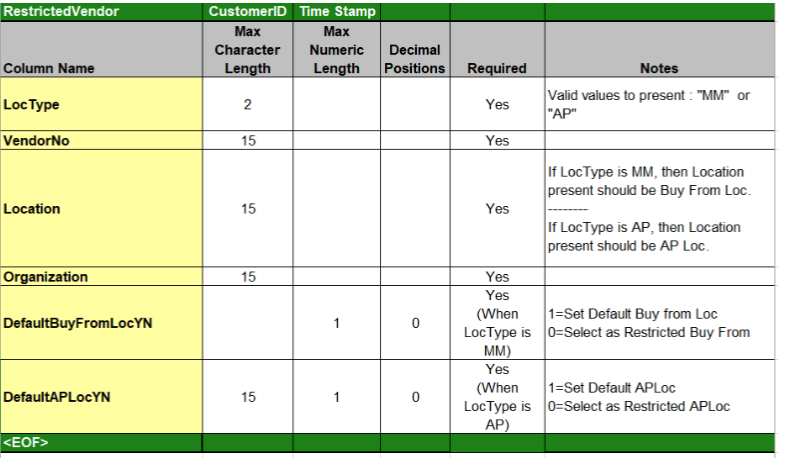
Fields for the Import to Restrict Vendor AP and/or Buy From Locations
- Enter information on the template that you acquired from the Help Desk, and save it (as .csv) on your local disk.
- Upload the file to ERP. Go to: Work in Materials > Imports/Exports, and Financials > Restricted Vendor Import.
The list Restricted Vendor Import - for Import Type RestrVendorImpt
appears. It displays existing imports, if any. Otherwise, No Data appears. This list and the import it provides use the standard ERP import process.
- Click New. The Import panel appears.
- In the File to Upload field, click Choose File to go to your local disk where you have saved the .csv template with your data on it.
- Select it. The file appears on the Import panel.
- You can upload and import the file in one step. Or, to upload only and process the file into an import later, select Load and verify, No import .
The list of imported files appears with your uploaded file at the top. (Click Help for information on the columns in the list.)
When the file processes with no errors, its Status is "Complete."
-
Otherwise, if there are errors, click Menu > View Import Details > View Messages to diagnose the problems. If the vendor is suspended, for example, the import processing ends with an error, and a message is displayed.
When the import is successful, you can open your vendor records and view the new restrictions that you just created.
Copyright © 2023 by Premier Inc. All rights reserved.