The list of users appears.
The Users panel appears, open to the General tab.
This topic outlines how to set up and use the vendor approval process and how to monitor vendor approvals in progress. Financial staff and anyone who creates or approves new vendors should find parts of the discussion useful. The information also will be of interest to system administrators.
The vendor approvals process enables designated approvers to review and approve -- or reject -- new vendors created in Accounts Payable or Materials Management before they can be used in the application. The approval process also applies to changes in the AP location Check Name field values for an existing AP vendor.
A new vendor or a changed Check Name can be reviewed by a single “direct” approver or routed to an approver group.
Vendors subject to the approval process are suspended until approved, and cannot be used anywhere in the system where suspended vendors are invalid. Once approved, the vendor and its AP locations are automatically unsuspended.
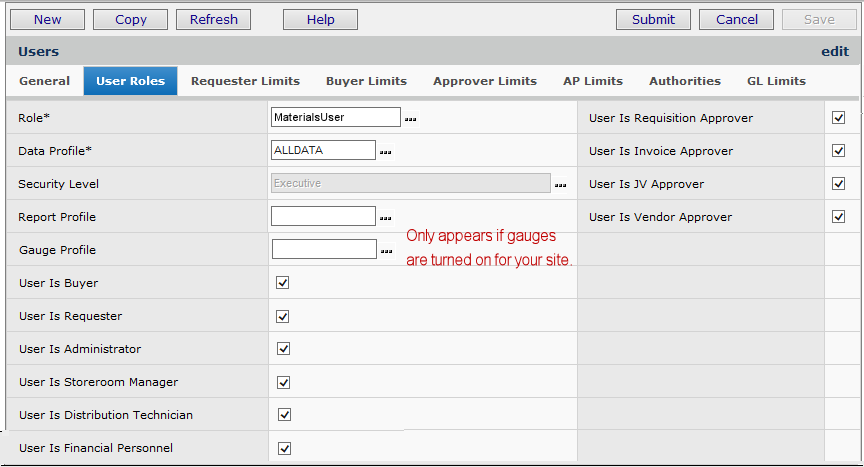
Settings on the User Profile determine whether new vendors created by the user must go through the approvals process. Users who have either a Vendor Direct Approver or an Vendor Approver Group assigned have their newly created vendors enter the approval process before the vendors can be used in the application.
Role objects control access to vendor approver groups and vendor approval queues. You may need to change the settings of role objects for users who work with and administer vendor approvals.
The default setting for role objects is None.
The documentation topic Set Up and Maintain Users, Administration, and Security explains role objects and user security in detail.
Approval requirements are set up as follows:
The system determines whether a vendor needs approval by the settings on the User Profile of the person creating the vendor. If the user is flagged as needing approval, the system routes the vendor to the approver group or direct approver assigned on the person's User Profile.
Each approver has an approval queue that contains new vendors or changed Check Names awaiting approval. An approver can select an unapproved vendor from the queue and approve or reject it.
If specified on an approver's User Profile, the system can send a notification to an approver when a new vendor (or vendor with an updated Check Name) is placed on the person's queue. Notifications can also be sent to the person who created the vendor or updated the Check Name upon approval or rejection.
An all-approver queue of vendors awaiting approval is also available. This queue is useful for managers or others who have higher-level authority for all ERP application functions. (See Security for the role object setting.)
Setup for vendor approvals processing has these steps:
Step/Task |
Path |
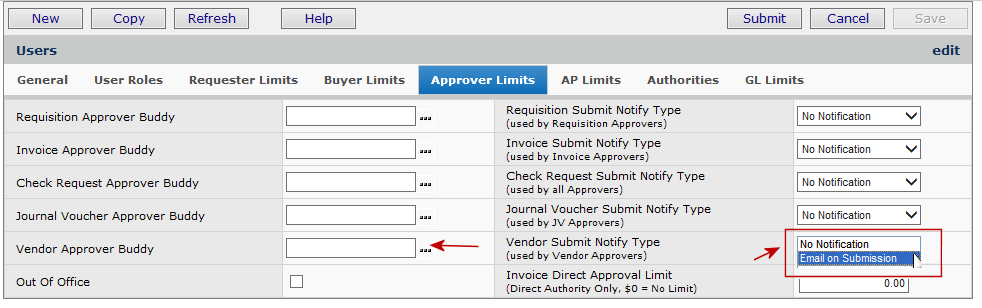
| 1. Identify approvers. - Identify users who approve new vendors or updated AP location Check Names. - Select notification options and an approver buddy for each approver. |
Administration > Administration > Users > edit user > User Roles tab and Approver Limits tab |
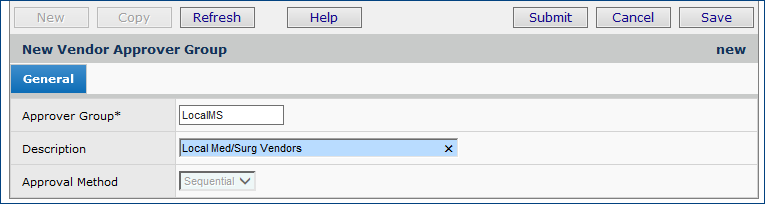
| 2. Create approver groups. | Accounts Payable > Vendors > Vendor Approver Groups > New |
| 3. Identify users who create vendors or update Check Names and
who must have them approved. - Assign a direct approver or approver group to each user. |
Administration > Administration > Users > edit user > AP Limits tab |
| 4. Select approval notification options for a user who creates vendors or updates Check Names. | Administration > Administration > Users > edit user > AP Limits tab |
| 9. Enter reason codes to be used in approving or rejecting a vendor/Check Name. | Accounts Payable > Tables > Reason for Approval/Rejection |
Vendor approver groups allow vendors and updated Check Names to be routed to multiple approvers.
The Vendor Approver Group Edit panel appears (Figure 4). When you add users to the group, they are listed on the lower part of the panel.
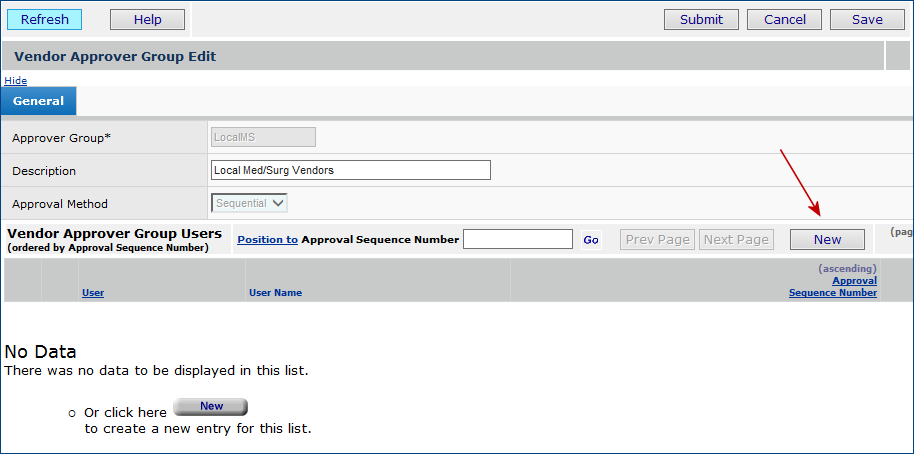
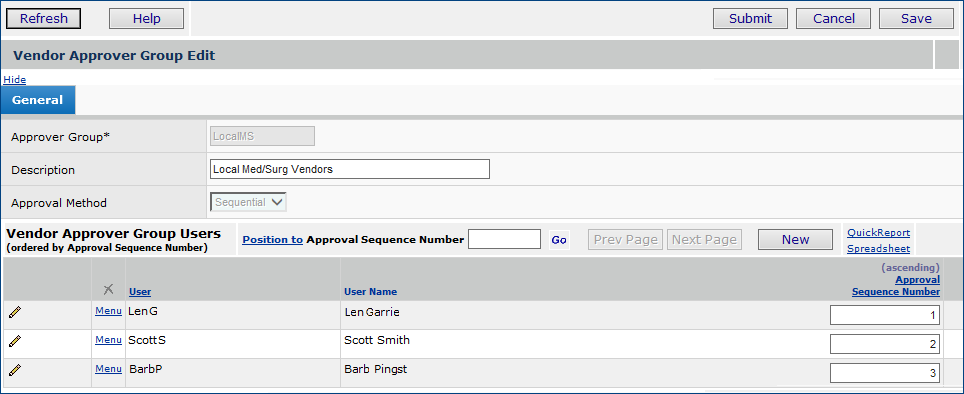
To enter more users, go back to Step 5 and follow the steps until the approver group is complete.
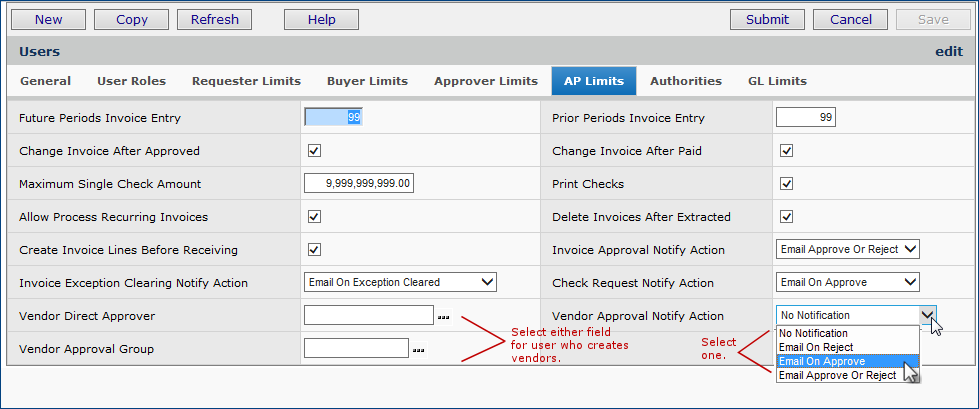
For users who create new vendors, each user profile lets you specify whether vendor approval is required, and notifications (if any). Several fields on the AP Limits (Figure 7) panel are available for this purpose.
Reason Codes provide a shorthand method for communicating the reason for rejection (or approval). When a vendor approver approves or rejects a new vendor or a changed Check Name, the approver selects a Reason Code from a list that you or your system administrator creates.
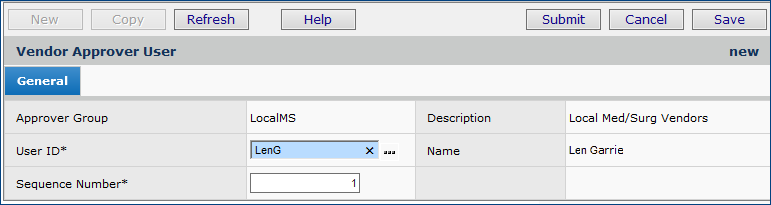
When you create a new vendor, the Approval tab contains fields that default to approvers or approver groups assigned on your User Profile.

When you create a new vendor that needs approval, the Vendor Status is set to Pending Approval and the vendor is suspended. When the vendor is approved, the Vendor Status is Approved and the Suspended flag is removed. After routing through the approvals process, if the new vendor is rejected, the Vendor Status is Rejected, and the vendor remains suspended. You may also see the Vendor Status Rejected, Updating Vendor. This value appears when the vendor has been rejected, and the user is updating the vendor information before resubmitting the vendor for approval; the vendor is still suspended.
With updated Check Names, if a vendor requires approval, the system reminds you that changing the Check Name will trigger the approval process.
You can accept (click OK) or cancel (click Cancel). Clicking OK routes the changed Check Name through approvals. The AP location is suspended until approval is granted. The Vendor Status is set to Pending Approval. After routing through the approvals process, if the Check Name change is rejected, the Vendor Status is Rejected and the AP location with the Check Name change remains suspended.
The Vendors list lets you monitor the progress of a newly created vendor or an updated Check Name through approvals.
For vendors that must be approved, or for updated vendor Check Names that must be approved, the Vendor Status column indicates the approval status. Values are:
Approved - The vendor or the updated Check Name for an existing vendor has been approved, and is available for use in POs.
Rejected - The vendor/Check Name update has been rejected by approvers.
Pending Approval - The vendor/Check Name update has entered the approval process.
Rejected, Updating Vendor - The user is updating information for a rejected vendor before resubmitting the vendor for approval.
Direct Approvers are solely responsible for the approval or rejection of a new vendor or updated Check Name for an existing vendor. When they approve a vendor, the Vendor Status is Approved.
Approver groups share responsibility for the approval or rejection of a submitted vendor/Check Name update. When a member of an approver group approves a vendor, the Vendor Status remains at Pending Approval until all eligible approvers in the group have reviewed the vendor. When the last eligible approver approves the vendor, the Vendor Status is set to Approved.
Vendors and Check Name updates are routed first to last, sequentially through an approver group, based on the sequence number associated with each group member.
When an approver user sets his/her "out of office" status, approvals for the user are routed to the user's approver buddy.
Approvers access vendors waiting for approval through approval queues.
- My Vendor Approval Queue is unique for each approver and shows vendors assigned to the approver.
If you are a vendor approver, this queue contains vendors assigned to you.
-
All Vendor Approval Queues shows vendors assigned to all approvers.
Based on a vendor approver's user profile settings, the approver may be notified by an email when a new vendor is placed in his/her approval queue.
The Accounts Payable main Contents contains menu links to the approval queues.
The review reason is also supplied in the column Reason Approval Assigned. This column can have these values:
For Vendor Approval - The vendor needs approval because it is new.
For Vendor Change Approval - A change made to the vendor; i.e., an updated Check Name needs approval.

Notes:
-
When the Vendor Status is Pending Approval, the Submit button is disabled on the vendor Edit panel. A user who edits the vendor cannot click Submit to process the vendor. The vendor must first be approved.
Consider the situation where a user made a change to a vendor AP Location, submitted it for approval, and it was rejected.
The AP Location was set to suspended when it was submitted for approval and, because it was rejected, it stayed in that status. The problem was: how to get the AP Location unsuspended. Assume that the AP Location is not new and had been used prior to the change, so it was still needed and could not remain in a suspended state.
Normally, for a suspended AP Location, you can open the AP Locations menu and Unsuspend the AP Location. However, since this AP location had been through the approval review, the menu item for unsuspending it is grayed out (Figure 10).
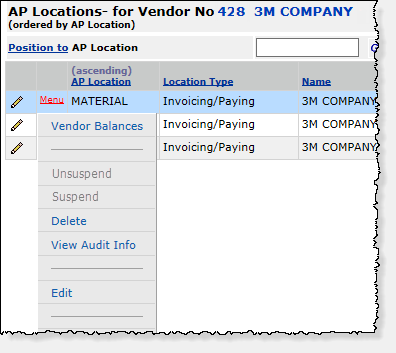
To resolve the problem, edit the AP Location record and undo the change that you made (or correct the problem that caused it to be rejected). Click Submit. The AP Location goes back into the approvals process.
When an approver's Out of Office status is set, vendors for the approver go to his/her approver buddy. If an approver group is assigned to the vendor, both the original approver and the person's approver buddy can belong to the approver group.
In this situation:
If you are a system administrator, or have the appropriate authorizations, you can view all vendors/updated Check Names for approval. The list is in the Vendor Approval Queue - All Approvers and Vendors (Vendors > All Vendor Approval Queue), Figure 11.

An accounts payable feature lets you create maintenance jobs for mass changes to vendor approver groups (Figure 12).
The mass approver change feature lets you swap multiple approvers in and out of approver groups for vendor approvals.
You can change the members of approver groups; remove approvers from groups; and add new approvers to approver groups.
The remove function also lets you remove an approver as the direct approver for other users.
Similar to other "mass change" features, you first create a "mass assignment" job, and specify the approver reassignments in the job.
When the job runs, the changes take effect.
Details on using the mass maintenance feature are in the topic "Making Mass Approver Changes."
The fields Approval Status and Approval Needed Date have been added to these report objects for vendor approvals:
Vendor AP and BuyFrom Locations
Vendor Locations
Vendor Master
Vendor Master User Fields
Vendors Only.
Copyright © 2023 by Premier Inc. All rights reserved.