 .
.|
This topic discusses: |
Links to related topics: |
| Search Online Doc | |
| Current Release Notes | |
Over time, hospitals can accumulate multiple entries for the same vendor in their vendor databases. For example, a hospital may have records for a vendor called "AllMed, Inc." and another set of records for the same vendor listed as "AllMed Supply Co." Each may have multiple buy-from locations and/or AP locations, but, in the final analysis, the two vendors are really the same. In such a case, the hospital may wish to merge the vendor records and the associated AP and buy-from locations' records.
This topic describes the vendor merge feature.
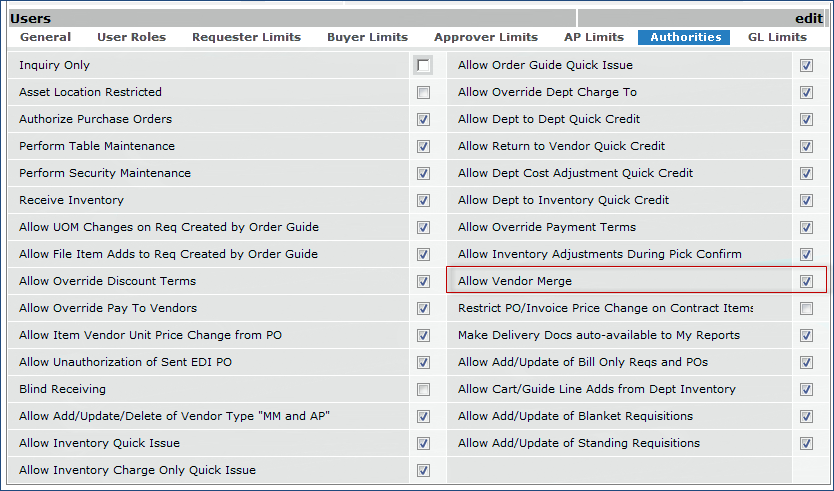
To merge vendors, you must have the appropriate authorization. Your system administrator
should set the Allow Vendor Merge field on the user profile
Authorities panel (Figure 1).
.
Returning to the example in the Overview, suppose a vendor database has one
set of records for the vendor AllMed, Inc. and another set for
AllMed Supply Co. Each has buy-from locations and AP locations.
As it happens, the two vendor names AllMed, Inc and AllMed
Supply Co. refer to the exact same vendor.
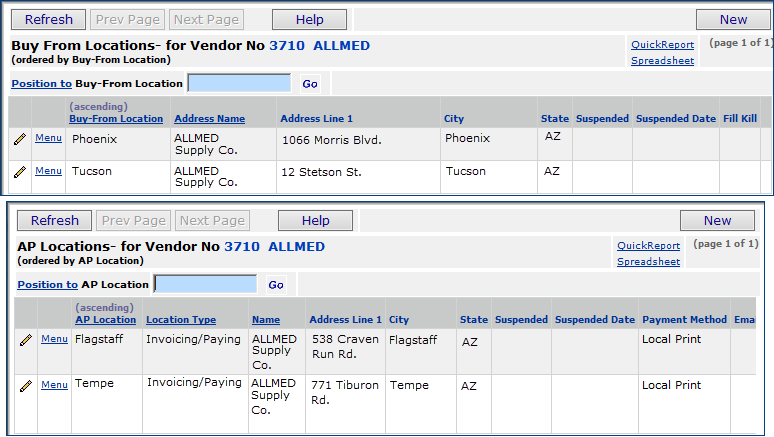
Figure 2 is the list of buy-from locations and AP locations that belong to AllMed,
Inc. Figure 3 is the list of buy-from locations and AP locations that belong
to AllMed Supply Co.

To reduce confusion for hospital staff ordering supplies, the two vendors can be merged -- along with their buy-from and AP locations -- into a single vendor.
If you prefer not to merge vendors completely, you can move or merge some (but not all) of one vendor's AP and buy-from locations into another vendor's AP and buy-from locations. Moving or merging all buy-from and AP locations does merge the vendors completely.
Also, you cannot merge only default AP or buy-from locations. You must merge either all AP/buy-from locations or only the non-default ones.
Merging vendors has several steps.
Important: The vendor merge process
makes significant changes in your site's tables. Contact Customer
Support before you undertake a vendor merge. Customer Support can make a backup
of your databases.
It is recommended that you perform vendor merges during non-working hours
for your site's Materials and AP staff.
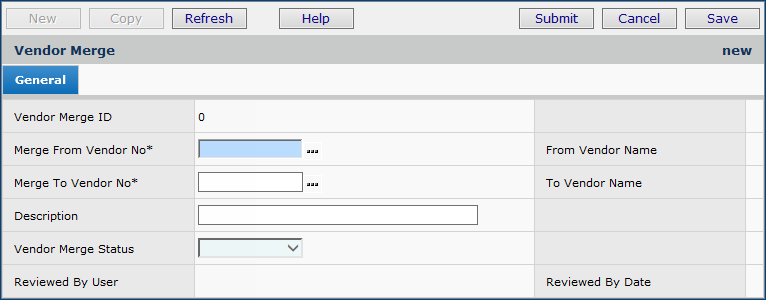
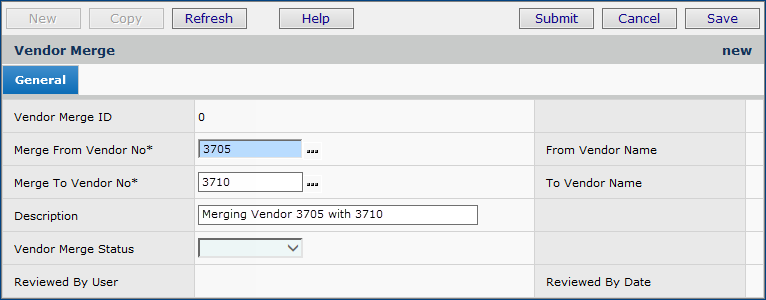
| Merge From Vendor No. | The vendor whose records will be merged into another vendor's records. When you merge vendors completely, the Merge From vendor disappears from the vendor list, and is no longer available. |
| Merge To Vendor No | The vendor receiving the records that are
being merged. When vendors are merged completely, the Merge To vendor remains available in the vendor list. |
| Description | A description of the merge job. |
On the Vendor Merge Selection panel (Figure 6)...
| Merge Type | What the Option Does | To Location Needed? | Notes |
| Do Nothing | Specifies that no merge action should be performed on the AP or buy-from location in the From Location column. | No. |
Select this option for any Move From vendor's AP or buy-from location that you do not want to include in the merge. |
| Merge | Merges an AP or buy-from location with the location specified in To Location. | Yes. Select the AP or buy-from location that the From Location is being merged with. |
If you select Merge for all the Move From locations, the vendors are merged completely. The Move From vendor will no longer be available. You cannot select a Move From vendor's default
AP/buy from location without merging the vendor completely. "Cannot merge SPECIFIED location because it is assigned as vendor VENDOR NO's default location. Merge all locations or reassign vendor's default." |
| Move | Move an AP or buy-from location to the Move To vendor. | No. | You may wish, in some situations, to only move one vendor's AP/buy-from locations to another vendor. |
Figure 6 shows the Vendor Merge Selection panel filled in for a complete
merge between vendors AllMed, Inc (569) and AllMed Supply Co. (570).
In the figure, the buy-from locations "Boulder" and "Fremont"
for AllMed, Inc. will merge into the buy-from locations "Phoenix"
and "Tucson," respectively, for AllMed Supply Co.
Similarly, the "Colorado Springs" and "San Diego" AP locations
for AllMed, Inc. will merge into the AllMed Supply Co. "Tempe" and
"Flagstaff" AP locations, respectively.


- The merge identifier and the Vendor Numbers of the vendors being merged appear
at the top of the panel.
- At the bottom of the panel, the Merge Activity tab shows the tables affected
by the merge, the columns on the tables, and other information.
The first column, Sequence No, is the order in which the system
changed table information. Normally, changes begin at the Vendor ID level, then continue to the buy-from locations, then AP locations, looping until all relevant
tables are changed.
The Record Count column shows the number of records in each
table potentially affected by the merge. This column, in particular, is worth
some attention.
If you note that a very large number of records are subject to change, you may
wish to reevaluate whether merging the vendors is a good idea.
- The Vendor Merge Selection tab contains the specified buy-from and AP location(s).
The information on the Vendor Merge Selection tab can be edited.

To move AP locations or buy-from locations, follow the same steps as Merging Vendors Completely, with the following differences:

Complete the Review and Execute steps as described in To merge two vendors completely.
As long as an AP or buy-from location is not the "From" vendor's default, it can be merged with an AP or buy-from location for the "To" vendor. Follow the steps for Merging Two Vendors Completely, with this exception:
At the Setup Step, when you reach the Vendor Merge Selection panel...
Follow the rest of the instructions for reviewing and executing the merge.
When you merge vendor AP locations and / or buy-from locations, you will see
the change on requisitions. purchase orders, and invoices for the vendor. History
and statistics for the vendor also reflect the change.
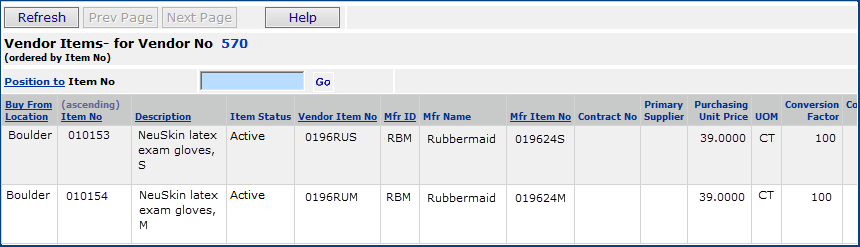
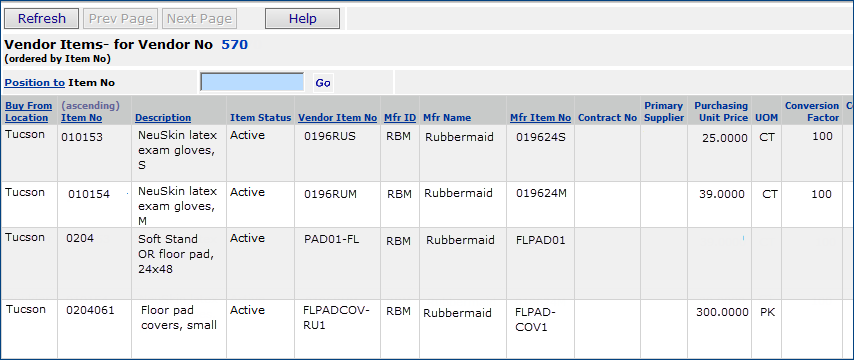
If you are merging buy-from locations, items in the "From" vendor's
buy-from location(s) are merged with items in the "To" vendor's buy-from
location(s).
For the merge example with AllMed, Inc. and AllMed Supply Co.,

The system keeps a record of vendor merge data that you can view at any time.
A menu option on the Vendors list that displays vendor merge activity for a specific vendor. Merge information is available for both "from" and "to" vendors on a merge.
A tab on the Vendor Inquiry panel that also displays vendor merge activity for the vendor.

The Vendor Merge list panel appears (Figure 14 ). The Vendor No and Vendor Name are in bold for each merge on the list.


The panel containing data elements changed in a vendor merge is also available from the Vendor Inquiry.
Copyright © 2023 by Premier Inc. All rights reserved.