| This topic discusses: |
Links to related topics: |
| Search Online Doc | |
| Current Release Notes | |
Systems such as Pyxis, Omnicell, Surgi-Server, SMS and others need updates of item information when changes are made to the information in the system. The Item Export feature creates batch files of updated item information for transfer across the web to a hospital's local network. The files can then be imported by a hospital's local systems and applications.
You can transfer item export files manually, as described in this topic. Manual exports can be saved on users' PCs or on a network server. If you have Pulse set up to handle the Item Export file type, you can rely on Pulse to handle the transfer.
Once the export batch files are downloaded successfully, the system deletes the details from the batch file. The batch file header is available for viewing for 30 days. After 30 days, headers are deleted.
To access organization, department, or asset location data, the organization, department, or asset location must be included in your data profile.
This feature is controlled by the "ItemExport" role object. By default, users with roles of Warehouse Manager, MM Manager, or Admin have access at security level All for the "ItemExport" role object. See the discussion of roles in Set Up and Maintain Users.
A setting on the System Values panel addresses the situation in which a large volume of exports is processed and many of the export files are empty. The field is Auto-Complete Empty Exports, and it applies to GL exports, AP transactions exports, item exports, and warehouse exports.
For details, see Auto-Complete Empty Exports.
From the Materials Management main Contents, select Imports / Exports & Financials > Item Export. The Item Export list appears (Figure 1).
Click New. The Item Export Selection Parameters panel appears (Figure 2), with the Preview panel below it.
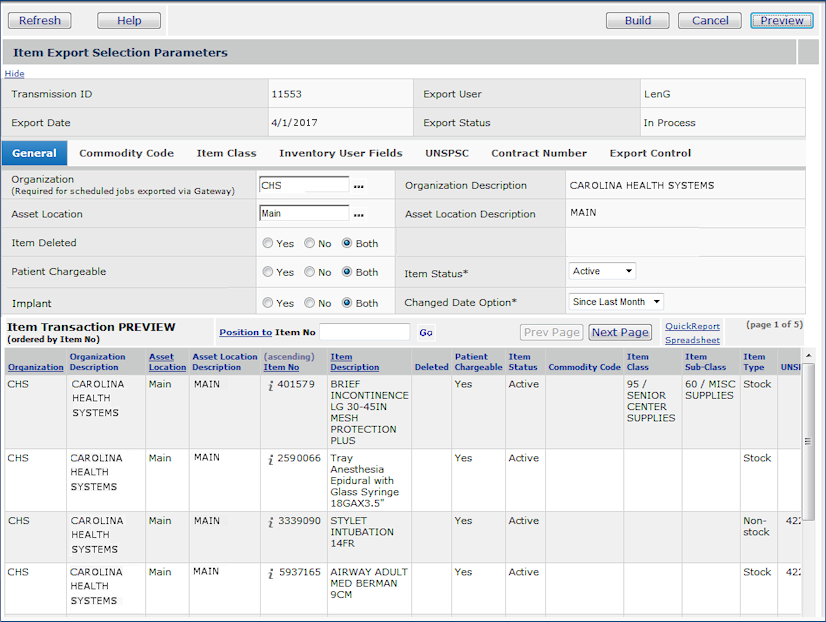
The General tab contains fields that identify items in a broad way, such as the items' Asset Location or whether the item is patient-chargeable.
The Changed Date Option and the Changed Date fields are particularly useful if you run the item export as a scheduled job, and wish to automatically download items that have had changes on a given date, or within a particular timeframe.
In identifying items that are candidates for export with the Changed Date Option, the system looks for changes in specific fields of an item in the item catalog, item inventory, item vendor, and item vendor UOM records. The fields are listed below in Table 1:
| In the Item Catalog: |
CommodityCode ItemAlias ItemDesc ItemClass ItemSubClass LatexFreeYN MSDSURL ItemPicURL |
InventoryGroup |
| In the Item Inventory: | ABCClass
|
ImplantYN |
| In the Item Vendor record: |
ContractNo |
PrimarySuppYN VendorItemNo |
| In the Item Vendor UOM record: |
LowestUOMYN DftIssueUOMYN DftPurchaseUOMYN |
UnitOfMeasure UOMConvFactor VendorUnitPrice |
When a change has occurred in any of the fields in Table 1 on an item record, within the specified timeframe, the item is a candidate for export. You can select any of the choices under Changed Date Option to identify the timeframe for item changes. If you want to search for items that have changed on or after a particular date, use the Change Date field with a Changed Date Option of Specified Date. Enter the earliest date when item information could have changed.
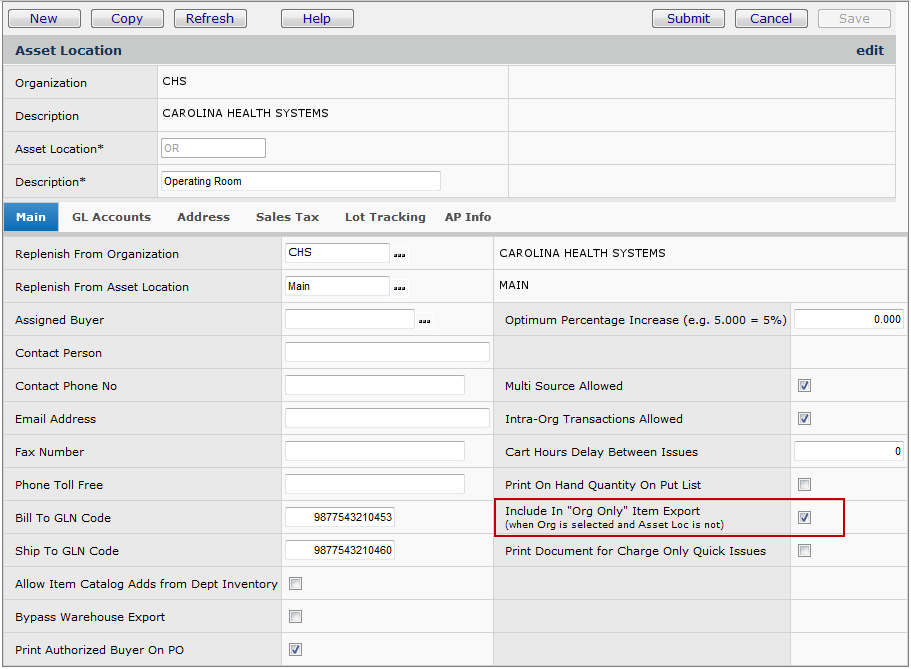
You can include an asset location in an item export for an organization by selecting Include In "Org Only" Item Export on the Asset Location edit panel.
Then, when you enter an organization in the Organization field, but do not specify an asset location in the Asset Location field, only items from asset locations with Include In "Org Only" Item Export checked are exported.
If you wish to exclude an asset location from an organization-specific item export, uncheck the field Include In "Org Only" Item Export on the Asset Location edit panel.
Note: When you create an item export without specifying either an organization or asset location, the Include In "Org Only" Item Export setting is ignored and the item export will include all items from all organizations and all asset locations (no matter the status of the “Org Only” flag) that meet the export criteria.
The Asset Location edit panel is available from the Materials Management main contents.
Figure 3 - Asset Location Edit Panel
This panel allows you to select items for export by commodity code.
A commodity code is an identifier that may be required and specified by local regulations to track certain types of commodities. Enter the commodity code of items whose information you wish to export For details on commodity codes, see View an Item's Commodity Code.
This panel allows you to specify items for export by item class. Item class is indicated by a code (such as "20," "M/S," "House"). The item class may be used at your site to categorize different types of items; for example, Implants, Medical/Surgical, Housekeeping, etc. Enter the item class for items whose information you are exporting. You can specify up to 6 item classes. Item classes used at your site are located in the Materials Management Tables. See Using Materials Management Tables for details.
This panel lets you select items according to user-defined fields; that is, fields that your site has defined as part of the item inventory record.. You can enter up to six user-defined field names. See User-Defined Fields for details on user-defined fields.
Click Preview. The system shows you the items that meet your selection criteria.
Click Build. The system builds all the item records you identified on the selection panel into a batch export file identified by the Item Export No. You are returned to the Item Export list.
Click Refresh. Messages display the status of the export file as it is being built. (Click a message to read it.)
Note: Your file is saved as a .csv (comma separated value) file. You can open this type of file with Microsoft Excel.
Use this tab to specify items by UNSPSC code, if you use UNSPSC codes.
A UNSPSC code has eight integers, divided into four parts. The parts are:
- Segment (first two integers),
- Family (second two integers)
- Class (third two integers)
- Commodity (last two integers).
You can use the panel to locate an entire UNSPSC code, or any part of a code. Click the prompt next to a field to display a select list of UNSPSC codes.
If you want to search for an item based on one part of the code, for example, Family, the select list shows all the codes that contain that part.
You can specify multiple code parts, for example, Class and Commodity, and the system will search for codes that contain all.
Note: The .csv file built for the export also contains the UNSPSC code field.
See "Using UNSPSC Codes " in the online documentation.
An item may be available on contracts that you have with one or more vendors/manufacturers. If you wish to select items for export by contract number, enter the Contract Number(s) on this panel.
Note: The items must first be associated with the contracts in the system. See Using Contracts for details. (Note: This discussion refers to the core system's contracts feature, not to Sourcing and Contract Management.
Export controls can be specified to further narrow the items for selection, as described in the next paragraphs.
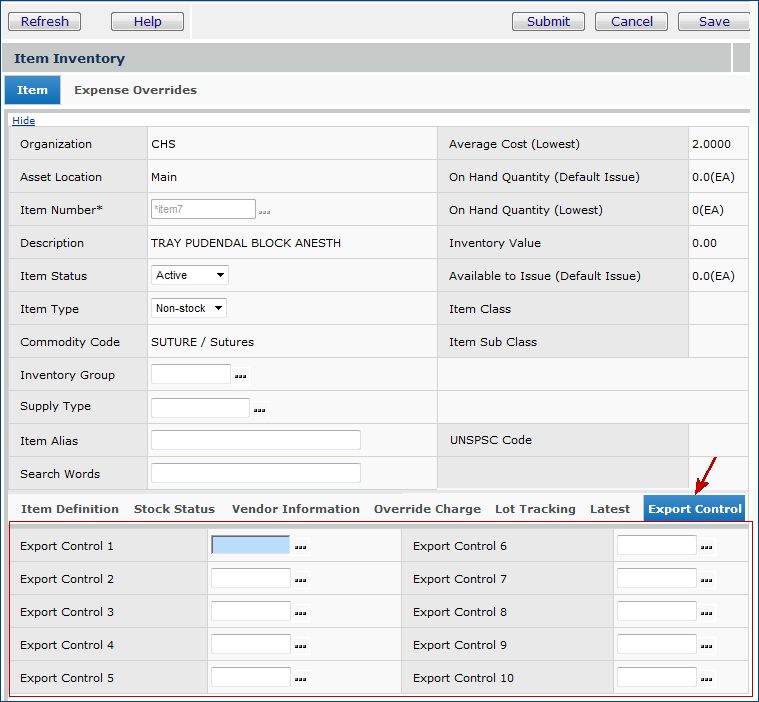
Export controls are another group of item selection parameters. Export controls for an item are specified on the the Item Inventory edit panel. Once defined and assigned to item records, you can specify export controls on the Item Export Selection Parameters panel.
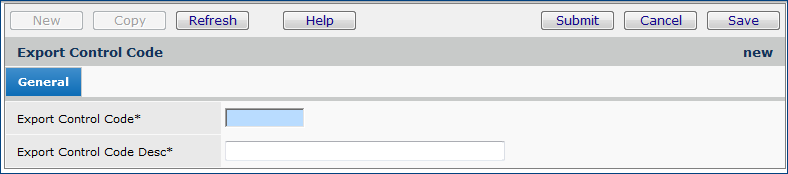
Figure 5 is an example of the Export Controls fields on the Item Inventory edit panel.
Once Export Controls are defined for inventory items, you can select items for export using the controls. Figure 6 is an example.

![]() To select up to ten export control values for the system to use in identifying items, click the Export Controls tab. Then, click the prompt next to an Export Control Code field to select a value.
To select up to ten export control values for the system to use in identifying items, click the Export Controls tab. Then, click the prompt next to an Export Control Code field to select a value.
Item Export Control Codes that you specify as selection criteria on the Item Export Selection Parameters panel are included in the spreadsheet file that the system creates for download. However, only the Export Control Codes that match the selected items are written to the spreadsheet. For example:
- Item ABC has Export Control Codes X1, X2, X5
- The Item Export Selection Parameters panel specifies codes X1 and X5.
- Only Export Control Codes X1 and X5 are included in the export spreadsheet for Item ABC.
![]() If you do not specify an Asset Location on the Item Export Selection Parameters panel General tab (Figure 7), in identifying the items for export, the system looks at all items for all item inventories across asset locations.
If you do not specify an Asset Location on the Item Export Selection Parameters panel General tab (Figure 7), in identifying the items for export, the system looks at all items for all item inventories across asset locations.

Copyright © 2023 by Premier Inc. All rights reserved.