Getting Supply Information for Your Department Version
Contents
Overview
System users can access several
types of information about departments' supply activities. In Materials Management,
you can view...
- Requisitions created for a department.
Requisitions are requests for items. The application displays lists of requisitions
created for departments, and the status of each requisition (Open, Approved,
Backordered, Released, etc.) Each requisition that is approved for a department
can be released. Releasing a requisition makes the requisition items eligible
for picking and issuing. You can set approval routing, and approval item types and dollar limits for all the users in a department on the Department Approvals panel.
- Backorders to a department.
– In a hospital that maintains supply inventories, department staff sometimes
requisition stock items that are not available. In this case, requisitions
for the items are backordered until the items can be re-supplied from the vendor
(or from another inventory).
– Non-stock and non-file item requests are backordered
because these types of items are not kept on hand, and must be ordered as
needed.
– You can print backorder reports for a department.
- Order guides:
Order guides are "shopping lists" of items commonly used by a department.
The application displays lists of order guides set up for each department and the
items in each order guide.
- Par carts:
Par carts may be set up for departments. The application displays par cart lists;
details about each par cart are available from menus on the list.
- Supplying asset locations.
Asset locations are storage areas that contain inventories of items. Each
department has at least one assigned asset location that supplies its items.
If a department has multiple supplying asset locations, one of the asset locations
is designated as the "default."
- Usage:
– For each year, the system maintains usage statistics
for departments. These statistics include the cost and quantity of file and
non-file items issued to each department.
– The application also generates expense reports for a
department.
- Deliver-to locations:
Departments that use direct delivery of items may establish particular delivery
locations. The application lists each department's deliver-to locations, and provides
location details.
Security
To access organization, department, or asset location data, the organization, department, or asset location must be included in your data profile.
The "Requisitions" role object controls access to requisition creation, display, and copying.
-
For the Requisitions - All Depts list, the minimum setting is Create for users to create a requisition, copy a requisition, or submit a requisition for approval.
-
For the Requisitions - Current Departments list, the minimum setting to copy a requisition is View.
Release Req for Picking is controlled by the "Distribution" role object. The minimum setting to release a requisition is Create.
Approvals are governed by the role object "Approval." The minimum setting to approve or reject a requisition is Modify. (A setting of View lets you review, but not approve a requisition.)
Allowances are governed by the role object "DeptAllowance," set to View, Modify, Create, or All.
Requisition Approvals for a Department
You can set requisition approval parameters by department. This approach lets you avoid maintaining approval data for multiple individual requesters in a department who all have the same approval settings.
To set up approvals for a department, you create an approval profile and assign it to the department. Approval profiles contain information that would normally exist in individual users' settings: item types (stock, non-stock, and non-file) and dollar limits above which item requisitions need approval. You can create as many approval profiles as you need and assign each to one or multiple departments. You can also assign direct approvers or approver groups to departments. The Department edit panel Approvals tab contains fields for this information.
If a department uses bill-only/bill-and-replace requisitions, you can define approval parameters -- an approval profile, and approver group or direct approver -- for bill-only requisitions.
Settings for Departmental Requesters outlines how to create approval profiles and assign them. Also, the section describes setting up approval rules for all of the users in a department.
Note: You must be a system administrator to access requester
limits information.
Commodity-coded items
For hospitals that use commodity-coded items, an approver or approver group is assigned to each commodity code. The approver or group approves requisitions for items that carry the commodity code. Approver assignments are in the Commodity Approvals table.
A separate routing and approval pattern can be set up for each department/commodity code combination (e.g., code 123, department 500; code 567, department 500; code 123, department 600; code 567, department 600; etc.) This approach is helpful when different departments require unique approval qualifications or routing rules for the same commodity code. Also, with the departmental approach, dollar limits specified for an approver group can be overridden.
The section Assigning Approvers to Commodity Codes outlines the process for individual approvers and for departmental approvers.
To view
a department's requisitions:
- From the Materials Management main Contents, click
Requisitioning > Departments.
The Quick Click panel appears.
- Under "I would like to...,"
select View the Departments List.
- Under "Ordered by...," select Department.
- Enter a department number in the "Starting With..." box.
- Click Show All.
The Departments list appears (Figure 1).
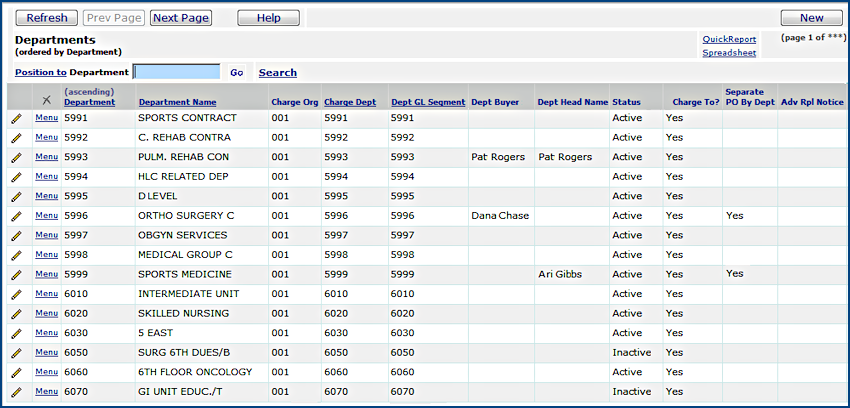
Figure 1 - Department List
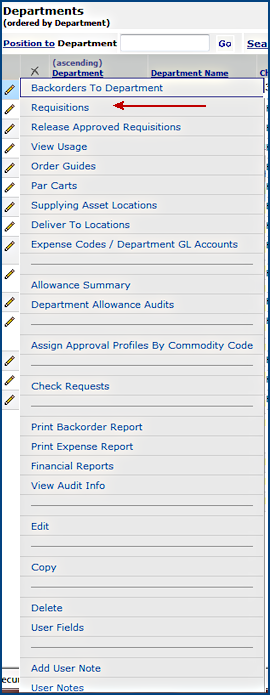
Figure 2 - Department List Menu
- Next to the department of interest, click Menu.
The Departments menu appears (Figure 2).
- From the menu, select Requisitions.
The Quick Click menu appears.
- Click Show All.
The list of requisitions for the department appears (Figure 3).
Note: You can also
access your department's list of requisitions from the Materials Management main Contents
by selecting
Requisitioning > Requisitions – Current Department.

Figure 3 - Department Requisitions List
- Return to the Departments list or click the Departments tab.
To release a department's approved requisitions:
- Follow Steps 1 through 6 in To view a department's
requisitions, as described above.
Releasing a department's requisitions makes them available in the warehouse
for picking and issuing.
- To release all of a departments approved requisitions, select Release
Approved Requisitions from the menu.
- If you want to release requisitions one at a time, proceed to Step
8 in To view a department's requisitions.
- Then, locate each requisition of interest, and select Release Approved
Req for Picking. You will only be able to release requisitions with
a Status of Approved.
A message displays, asking you to verify that you want to release the
requisition(s).
- Click Submit.
For details, see Release a Requisition and
Create a Pick List.
To view
order guides for a department:
- Follow Steps 1 through 6 in To view a department's
requisitions, as described above.
- Select Order Guides from the menu.
The Order Guides Quick Click menu appears.
- Select View the Order Guides List.
- Click Show All.
The list of order guides set up for the department appears (Figure 4). (No Data appears if none have been set up.)
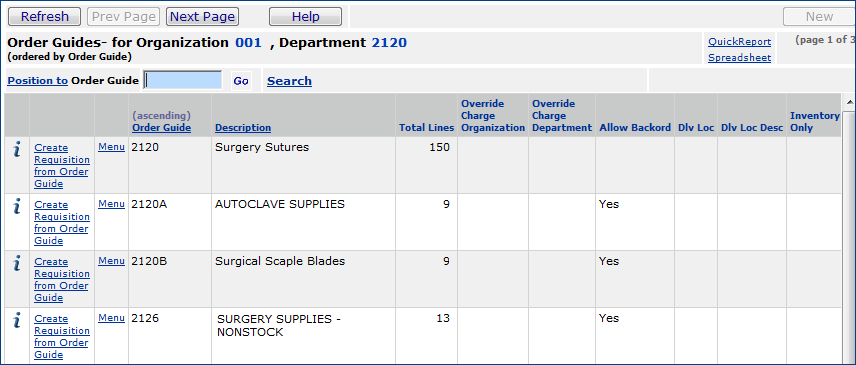
Figure 4 - Order Guides List
- From the Order Guides list, you can create requisitions using any order
guide. Click Create Requisition from Order Guide.
See Create an Order Guide and Using
an Order Guide to Requisition Items for more information.
To
view par carts for a department:
- Follow Steps 1 through 6 in To view a department's
requisitions, as described above.
- Select Par Carts from the menu.
The Par Carts list appears (similar to Figure 4).
- To create a requisition using the par cart record, select Create
Requisition from Par Counts.
- To see the lines for any par cart, click Menu > Inquiry.
Tabbed information appears. The list of items on the par cart is on the
Par Cart Lines tabs.
See Par Level Replenishment for more information
on creating and using par carts.
To
view backorders:
- Follow Steps 1 through 6 in To view a department's
requisitions, as described above.
- Select Backorders To Department from the menu.
The Backorders list appears.
- From the Backorders list, you can view each backordered requisition
by clicking Menu > Requisition.
- You can cancel a backorder by clicking Menu > Cancel Backorder
next to any backorder on the list.
To
view your department's asset locations:
-
Follow Steps 1 through 6 in To
view a department's requisitions.
- From the Department list menu, select Supplying Asset Locations.
The asset locations assigned to the department appear (Figure 5). (No
Data appears if none are assigned.)
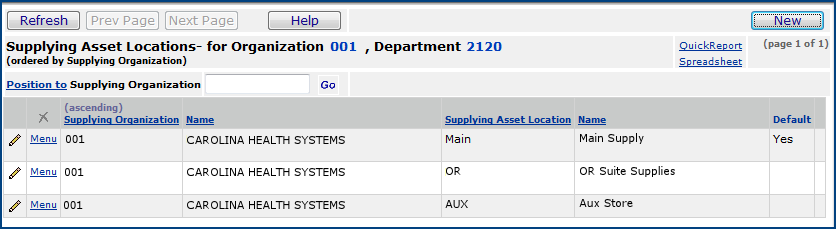
Figure 5 - List of a Department's Supplying Asset Locations
The list shows all the asset locations that are responsible for
supplying the department's items. Notice that the default supplying asset location
is designated by "Yes" in the Default column.
To view a department's deliver-to locations:
- From the Materials Management main Contents, click Requisitioning > Departments.
The Quick Click panel appears.
- Under "I would like to...," select Deliver To Locations.
- Enter a department number in the "Department" box.
- Click Go.
The list of deliver-to locations appears for the department, or No Data, if no deliver-to locations exist.
From the menu next to each deliver-to location, you can edit the location's
record.
To
view usage:
-
Follow Steps 1 through 6 in To
view a department's requisitions.
- From the Department list menu, select View Usage.
Usage statistics for one or more years appears (Figure 6).
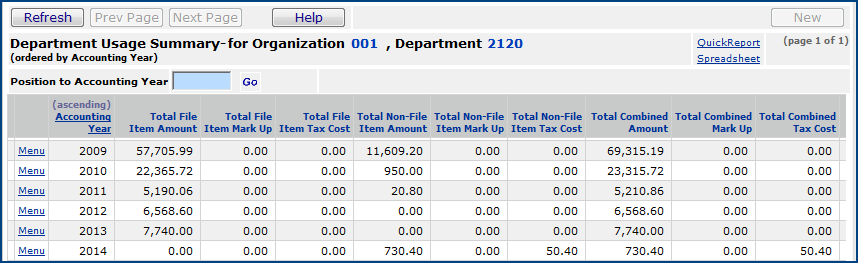
Figure 6 - Department Usage Statistics by Year
- For any year on the list, to see usage information by item for your department,
click Menu > View File Item Usage or Menu > View Non-File
Item Usage. The Item Usage list appears. The list contains file or non
file items with usage data by item.
- To see detailed usage information for any item, click View Usage Detail
next to the item on the Item Usage list.
To
view expense codes:
-
Follow Steps 1 through 6 in To
view a department's requisitions.
- From the Department list menu, select Expense Codes / GL Accounts. The Expense Codes list appears (Figure 7).
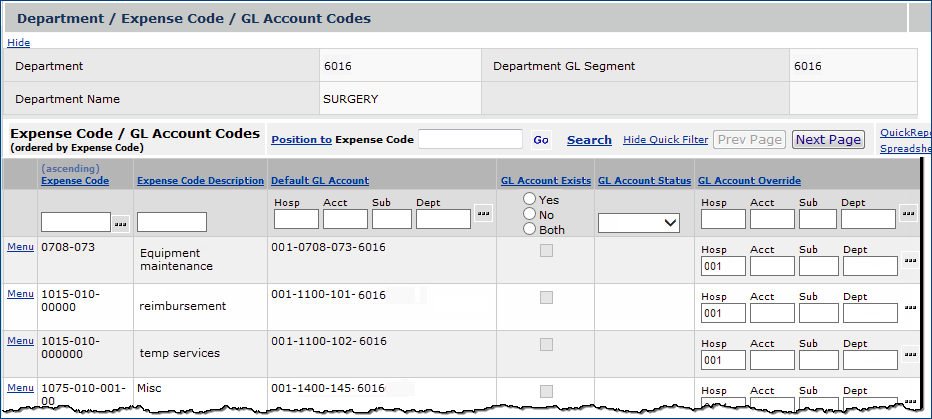
Figure 7 - Expense Codes / GL Accounts
- From the expense code menu, you can create an expense code's Default GL Account.
- You can change a GL Account Override by clicking the [...] prompt next to the account number and selecting from the list.
To
view departmental allowances:
-
Follow Steps 1 through 6 in To
view a department's requisitions.
- Next to the department, select Menu > Department Allowance Summary.

Figure 8 - Department Allowance Summary
You can view the allowance summary for the current period or for the fiscal year by clicking the appropriate tab.
A detailed discussion of Department Expense Code Allowances can be found in the online topic Using Department Expense Code Allowances.
The Status of an allowance refers to whether expenses have exceeded the allowance or the defined threshold percentage.
- Good: Spend has not exceeded the threshold.
- Warning: Spend has exceeded the threshold.
- Exceeded: Spend has exceeded the allowance.
On the monthly Pending, Approved, Ordered, and Actual amounts, you can drill to requisition lines by clicking on the  .
.
The amounts in the panel columns are defined as follows:
- Pending: Sum of requisition lines that have entered approvals and currently have a requisition status of Open, Rejected, or Pending Approval.
- Approved: Sum of requisition lines that currently have a requisition status of Approved.
- Ordered: Sum of requisition lines that have a requisition status of Released, Backordered, or Partial Filled.
- Actual: Sum of processed invoices, receipts, cost adjustments, manual journal vouchers, and inventory adjustments; this amount may be negative of credit activity exceeds issuing.
The Remainder is calculated differently for the current month and for closed months .
- Current Month: All of the above amounts (Pending, Approved, Ordered, and Actual) are subtracted from the allowance.
- Closed Month: Only the actual amount is subtracted from the allowance.
If the remainder is a negative amount when the month closes, the difference is rolled into the year's allowance total. It does not affect subsequent months' allowance amounts.
To
print a department backorder report:
- Follow Steps 1 through 6 in To view a department's
requisitions, as described above.
- Next to the department,select Menu > Print Backorder Report.
The Report Selection Values panel appears
(Figure 9).
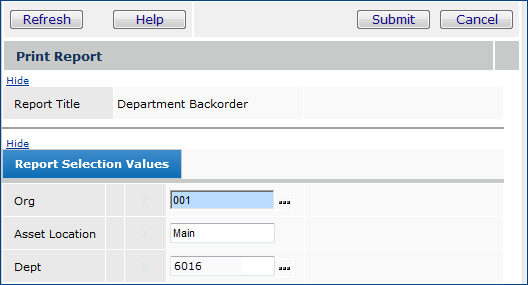
Figure 9 - Report Selection Panel for a
Department
- Verify that the Organization, Asset Location, and Department are correct for the report. If not, select new values.
- Click Submit.
The application sends you a message that the department's Backorder Report is available
from Reports > My Archived Reports.
- From the Materials Management main menu, select Reports > My Archived
Reports.
The Reports list appears.
- Locate the Backorder Report that you requested.
- Click View Report to open the report.
The report appears.
- Then, click the printer icon (or select File > Print) to print
it on your local printer.
Running and Printing Department Expense Reports
The system provides reports on department expenses. You can run one version of the report
for a single department. With the appropriate data profile authorizations, you can also run the report to get information
for all the departments in a specified organization.
To retrieve department expense reports:
- From the Materials Management main Contents, select Reports > My Archived
Reports.
The Reports list appears.
- Locate the Department Expense Report that you requested.
- Click View Report to open the report.
- Then, click the printer icon (or select File > Print) to print
it on your local printer.
To run and print a report on a single department:
- From the Materials Management main Contents, click Requisitioning > Departments.
The Quick Click panel appears.
- Under "I would like to...," select Print Expense
Report.
- In the Department box, enter the department
number.
- The Print Report panel appears for you to select report data (Figure 10).
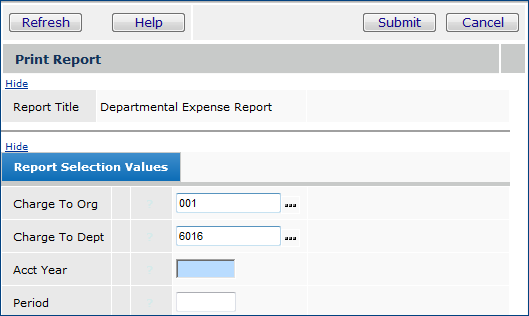
Figure 10 - Department Expense Report Select Fields
- Click the prompts to select the Charge to Org and the Charge to Dept.
- Enter the Acct Year for the report. If you leave this field blank, the report defaults to the value of the Reporting Year defined for the organization.
- Enter the Period for the report. If you leave Period blank, the report runs for all periods in the year.
- Click Submit.
The application displays a message that the report is is available from Reports
> My Archived Reports.
Note: The Department Expense Report is also available from the Reports > My Report Definitions menu.
To get a report for multiple departments:
- From the Materials Management main Contents, click Reports > Departmental
Expense Report.
The application displays a panel on which you can specify a Charge to Organization.
- Click the (...) to select a Charge To Org,
or accept the default.
When the Charge to Org or Charge to Dept is blank, the report runs for all organizations/departments.
- Click Submit.
The application displays a message that the report is is available from Reports
> My Archived Reports.
Note: The Department Expense Report is also available from the Reports > My Report Definitions menu. You can customize the report by copying the system's report definition. Rename the copy of the report definition and edit it to add, change, delete, or rearrange fields as needed.
Expanding the types of reported account transactions for a department
Some types of departmental account transactions are not automatically included in the Department Expense Report. For example, when a supply item is issued to a department, the GL account debit transactions are a department expense, and are contained in the Report. Credits to the GL inventory account, however, are not normally included. A System Values flag is available to optionally include or exclude all department-expensable GL transactions in the Department Expense Report. When this flag is set, the list of included accounts is expanded so that if the department segment of an account code relates to a department, the account transactions are included in the report.
Important: This report is only accurate for departments that are in the system's Department Table. In particular, sites that do not have GL validation enabled may have departments without the appropriate associated accounts. When this situation exists, the report does not include those accounts. Users may wish to review their department records to make sure that accounts are set up correctly before running this rep
Note: Patient charge expenses are always included in the Department Expense Report.
- A new report object “Account Dept Segments Missing Depts” shows department segments for account codes that do not have a corresponding record in the department table.
- A utility lets you associate an account segment with a department to create the department in the Department Table.
To unset/reset the flag for expanded account coverage in a Department Expense Report:
- From the Work in Administration main Contents, select Administration > System Values.
The System Values panel appears.
- On the far left, click Menu > Edit.
- Click the Other tab.
The Other panel appears (Figure 11).
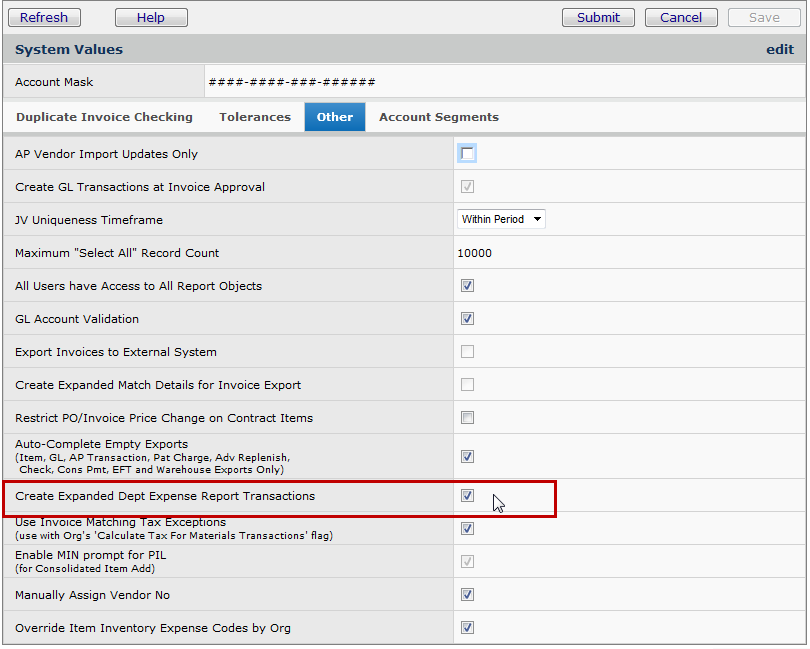
Figure 11 - System Values Flag for Expanding the Account Transactions Included in Department Expense Reports
- For the field Create Expanded Dept Expense Report Transactions,
- To expand the set of GL transactions in the report, select the box.
- To limit the type of account transactions in the report, unselect the box so that it is empty.
- Click Submit.
Copyright © 2023 by Premier Inc. All rights reserved.